Tuesday, July 27, 2021

New Silk Screens

I've been making more silk screens this week...always fun! I needed some spooky looking trees for a piece I'm working on. I have a system...I make the screen on a Thermofax, tape off the edges with 2" wide duct tape which is cut in half, print the screen on a file folder and last (and a great design tool for me) is to screen the image onto clear plastic......the kind you get at Joann fabrics people used to cover tables. It's thick enough to have substance but also flexible. 
Both the screen and the plastic with image go in the folder. I also note on the screen "top" which tells me which side is the side to face out. Yes, there are two sides to the film used to make the screen...one is more fragile and should face the fabric. The other side has a slightly rougher texture and more durable to screen on top of.
I love the clear plastic with the image on top. You can do this with anything you want to print on top....a stencil, a stamp or just marks with a brush. The clear image allows you to see what's going on underneath and helps with the placement of the image before you actually apply the paint which in many cases is permanent very quickly. I love this design tool and probably use it more than anything else.
I had some tiger lilies and wanted to make an image of them....2 sizes and one with the lily in a bunch of lilies.
I like the one with the background of lilies better...more interesting and still having the one lily dominant.
And the other spooky tree... a little smaller and coming in from the left side...the other larger one came in from the right. You'll see what I mean when I post the quilt these are being used in.
Okay...so call me sentimental but this is a drawing my daughter did when she was 3 years old...I've always loved it and decided it needed to be a screen...I will use it as a background filler with a very subtle colored paint...I love it!
Til next time....
 

Wednesday, July 21, 2021

A New Look

I have been busy working on a piece for an exhibit I'm in, in August....that along with family company has kept me away from my blog...I do apologize for not being more attentive. I did make it down to my space which I share with my pal - Mary Stori in Woolworth Walk Art Gallery.
My side (left) did need a little updating starting with a new system for my silk and rayon hand dyed scarves. My husband had built me a rack a while back which seems to work nicely in this space. I do lose some wall space but make up for it with additional scarf space which are good sellers...so a trade off.
Downtown Asheville has been very busy and many tourists and shoppers so here's hoping for some nice sales.
I carry some lovely scarves in both rayon and in silk...all are hand dyed or ice dyed, both methods using Procion MX dyes. They make great gifts and easy to tuck into a suitcase to carry home.

I also have some small wall art pieces and lots of different hand made cards featuring Eco printing, machine embroidery and antique quilts.

Please stop by and say hello if you're in the area....Woolworth Walk Gallery has many beautiful artist spaces, something for everyone. It's located on Haywood St. in downtown Asheville, NC. Our space is  located on the bottom level in booth number 235

Looking forward to seeing you soon.
 

Saturday, June 26, 2021

Playing and Experimenting


I finally turned on my heat press and started to play........I have to admit I was a bit nervous at first although it's incredibly simple to use..honestly..... an off/on switch, a button for temp and one for time and that's it. I guess the high heat it produces was a bit intimidating. 
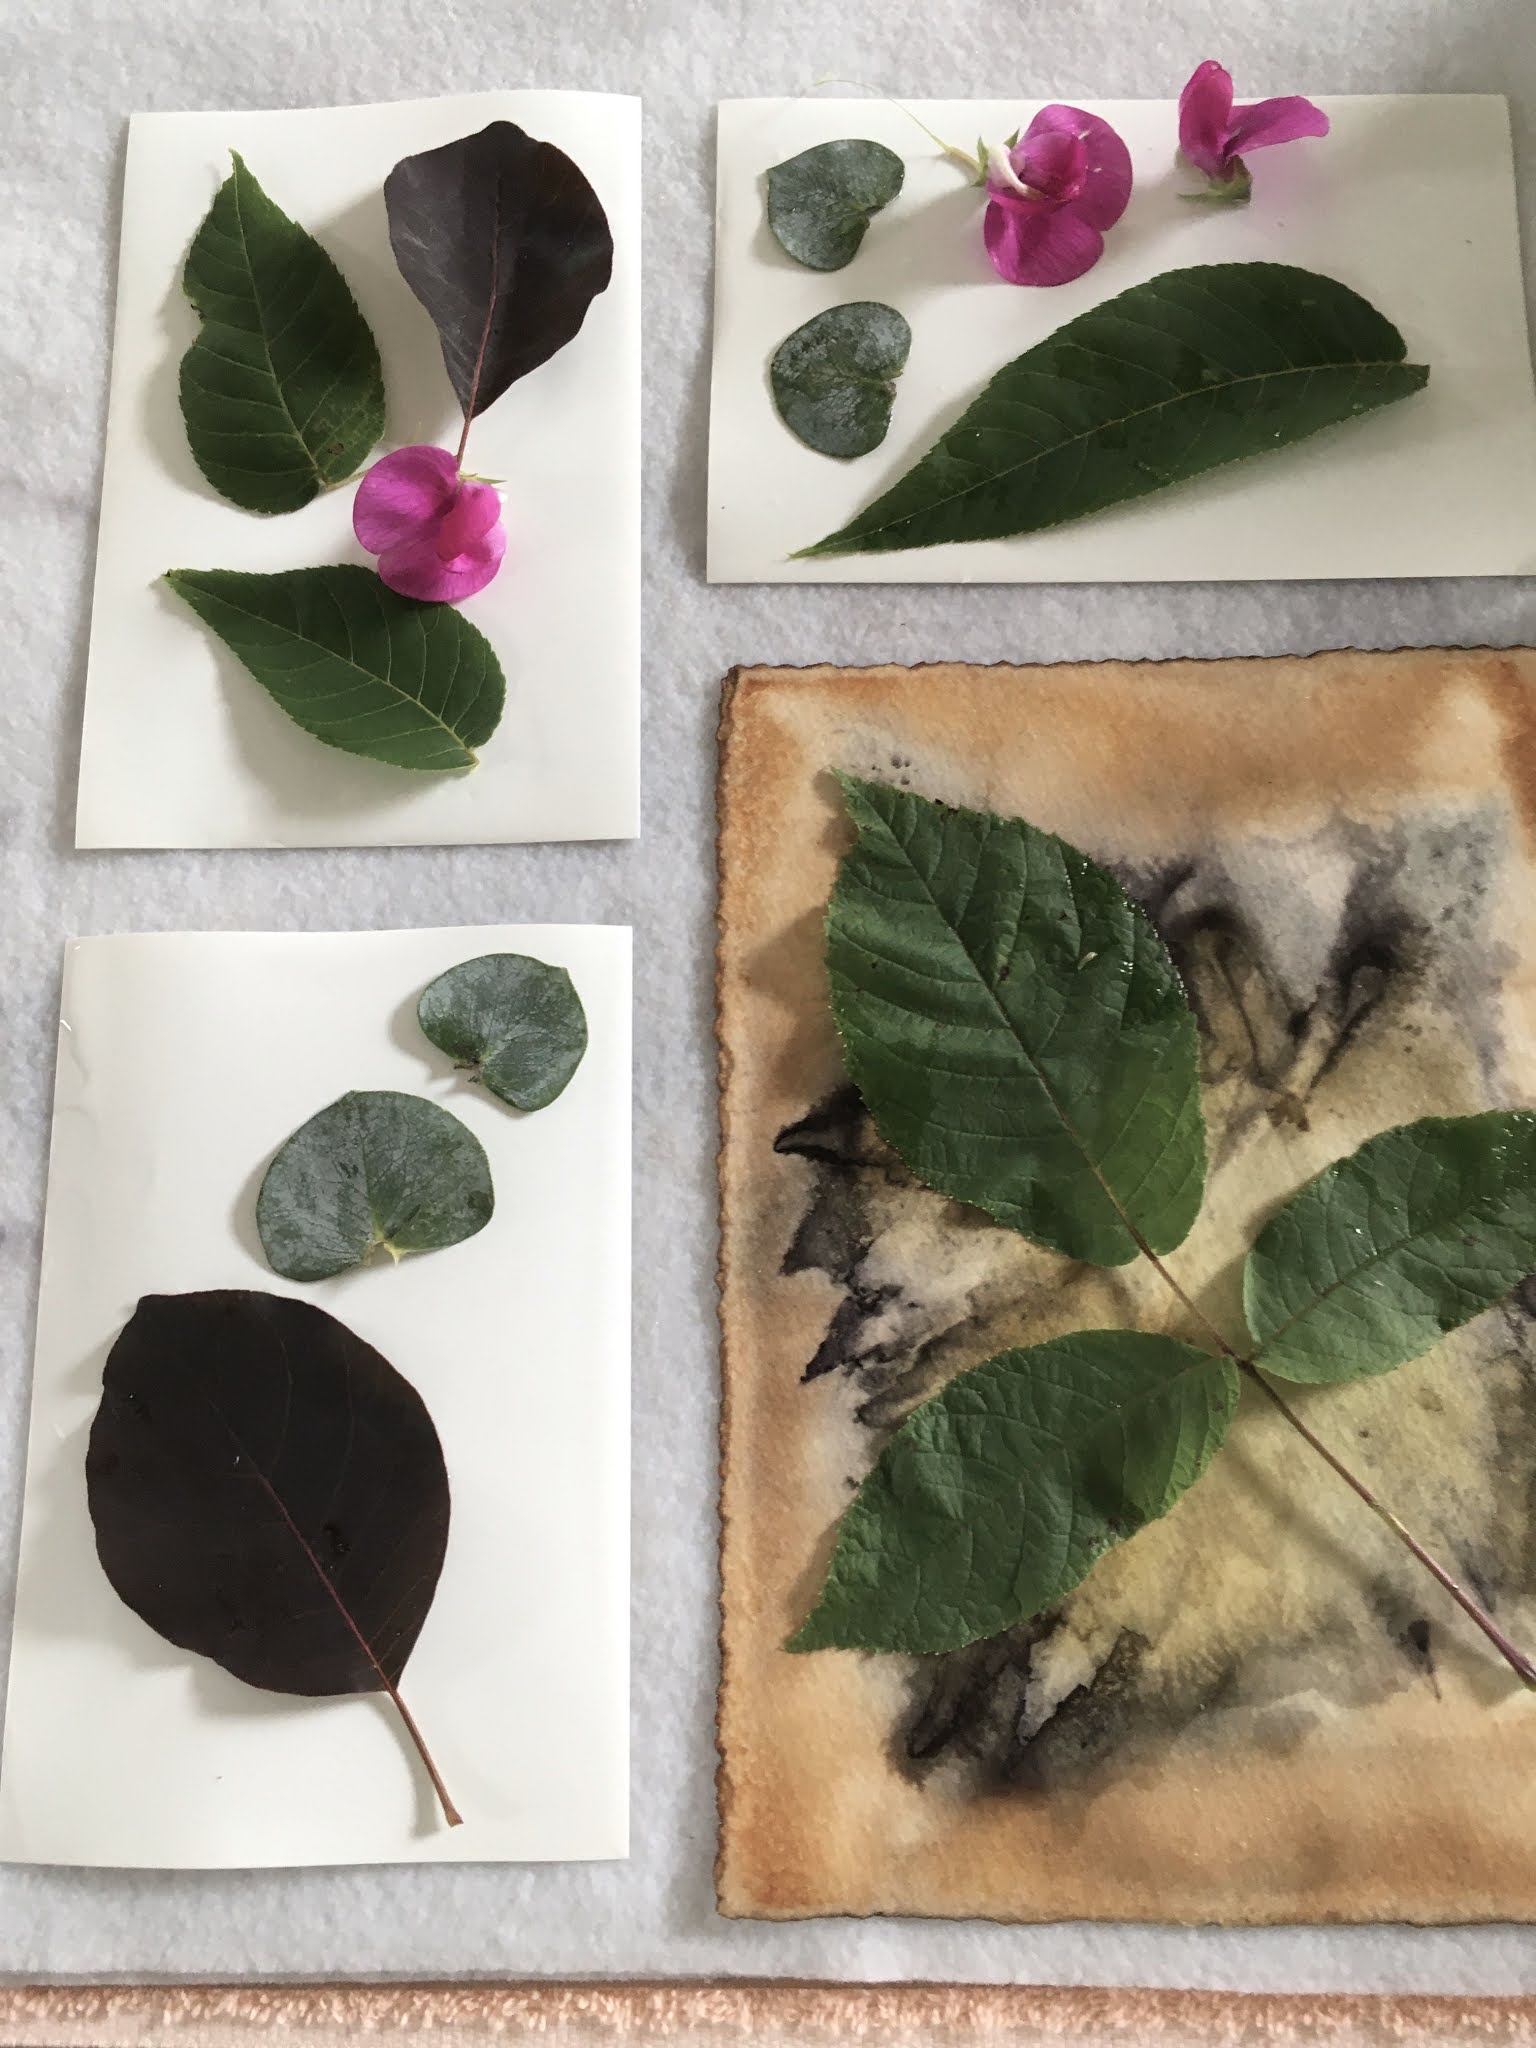
I know when I used to make bundles and boil them, many plants did not work so I really didn't know how the heat press would react. I used the leaves I knew worked and then took a walk along the road and just started cutting everything in sight......and...... everything seemed to work.
This first time around, I wanted to try different substrates to see what weights and finishes of paper would be better..no fabric this time. The very top photo is the before and after; left side shows the leaves laid down and on the right, the finished print..these were done on gloss photo paper. I was amazed that the photo paper did so well..above the gloss on the left, on the right -an old unsuccessful print I printed over..still bad!

On the left is Sumac which always prints beautifully, some Smoke plant leaves and cornsilk. On the right, the printed piece. The cornsilk didn't work but it will be a great resist...to be shown later.
Top example is foliage laid on Kilimanjaro 140 weight  paper.  In the finished sample below, the flowers did okay, I've seen some great results from other artists....the Rose leaves and Eucalyptus always do well and the Red Bud on top - great!

I had an Arches 300 lb paper which is way overkill but I wanted to try it anyway. I also had a Stonehenge 140 weight which is a great weight for this technique. Top photo is the foliage already printed but not removed from paper ...below is the printed image finished. 
This is an interesting sample (below) ...left is foliage and right is finished. Some leaves were along the road and I had no idea how they would do. The little blobs of color in the upper left came from a wild flower, some ferns and the bottom are from the Smoke plant. For best results, the most printable side is the "moon" side or the underneath side...not the sun side.
You can see the difference in the print. With the Smoke leaf plant, the 2 leaves slanted towards to right were placed with moon side down; the two slanted towards the left were placed with the sun side down. There's a big difference in the quality of the print or the intensity of color I should say. Some might prefer the more subtle look like you see on the left slanted ones.

This was a good print and I like the look of imperfect leaves. I don't know what leaves some of these are but I understand there's an app that can be used by pointing it at the plant and it will tell you what it is. Think that's on my list to get.

There was a lot of blurring on this print and I don't know why. I used a Dick Blick watercolor paper. I don't know the weight, but most are @ 140 lb.

 Some Red Buds, Smoke leaves, and pine needles. I was surprised at the needles and love the the way they printed. The bottom print uses some flowers which I was anxious to try...I'm pleased and I like the clarity of the edges. Hope to get more done this week as my calendar isn't too filled up yet. Will keep you posted.

Saturday, June 5, 2021

I Got It!!

It's here....my heat press that is. This is my birthday present which didn't come back in December - no leaves for experimenting. I am signed up for Jane Dunnewold's online Botanical Printing with a Heat Press class and I couldn't be more excited.
Jane is a marvelous teacher; I took her Complex Cloth week long workshop probably 20 years ago. It opened up a whole new way of working for me. 
A cart is coming soon and I'll be able to roll this out to the deck which is right off my studio. In the meantime, I have to get the press ready. The first step is to protect the plates with a Teflon cover.
I ordered the sheets of Teflon, cut them to size which was 15"square plus a seam allowance. Sewing very stretchy fabric in triangular shapes for the corners was the next step.  T-shirt fabric was a suggestion but it didn't seem heavy enough so I thought bathing suit fabric - very stretchy and heavier. 
I found what I was looking for at our local chain sewing store...pricey but I only needed a quarter of a yard and still far less expensive than purchasing made ones.
So here you go....
fabric sewn on corners top and bottom....
which slip over nicely on the top plate and
bottom...so I'm ready! The first session is Monday and I can't wait.
Even though I've been Eco printing for several years, I've never used a press so this is a totally new experience for me...will keep you posted.
 

Thursday, May 27, 2021

PTA May 2021 - The Good Ole Days!

Out PTA group came together last week after a very long time apart. Yes, we had met outside a few times with blankets and an open fire pit. There were a couple of times recently where we met but not with a full group and all were masked up. Today seemed like the good ole days, not having to wear a mask (all vaccinated), sharing a bottle of wine and snacks and sitting less than 6 feet apart. In other words, it felt great and I will never take these gatherings for granted...ever!
We met at Georgia's on her beautiful deck with vintage tablecloths, punch, wine and water 

and Peonies from her garden.
Georgia's cleverness shines everywhere...her "patchwork" birdhouse was adorable!
Barbara and Linda....
Lynne, Georgia, Cathy and Mary (sideview)
Gen, Dort and Janice....well...Hail, Hail, the Gangs all Here!
First order of business - show and tell...Gens daughter thought her bedroom needed a make-over...so Gen picked out a luscious paint color (you can see just the tip on the roll of paper) and Barbara is holding up the quilt made by Gen (sitting right in back) and matches perfectly. It will be beautiful!
Mary showing her extra long lap quilt for her tall son...love the black and white.
And more Mary with some of the pieces she made for her series using silhouettes...In case you're wondering...all the white dots....
are beads. Mary is the Queen of Beading and a lot of what she taught when she was teaching on the national circuit.
Lynne's beautiful quilt made with her hand dyed fabrics (which she creates).
And Dort's new wonderful and very funny series on dogs that mis-behave. This little pup is going after a ladies bag...
This little guy is "eyeing" that homemade pie...not quite within his reach but he'll figure something out.
I'm wondering what this little guy is thinking...hmmm...
And this is my favorite...Dort was given an unfinished sampler from a relative and asked if she wanted to finish and use it...Well, use it she did. It became this doggies favorite new binky...I mean, how clever is this!

And this little guy tugging at the robe. Dort has an incredible imagination and love for detail. It's always such fun to see her work.
It was a wonderful day...one of the best and I look forward to many more.
Hope your day is great too!