Tuesday, July 31, 2012

Welcome to the World

It's official - I'm a grandma - first time!...and our little girl came 2 weeks early weighing in at 6 lbs 13 oz.  Her one grandpa caught her with this expression when she was 2 days old, What a cutie.  We are all thrilled and of course my secret fantasy is to have a future little quilter.  My daughter never was inclined towards sewing and they say it often skips a generation, so I have my fingers crossed.
   So Audrey Elizabeth...Welcome to the world - full of wonders, beauty and lots of great adventures, it's going to be great!
Next post - back to quilting. Just had to brag a little!

Wednesday, July 25, 2012

Bobbin Work and Butterflies

I'm working on some samples for an upcoming workshop - same technique - different project.  I've always loved to do bobbinwork and usually do a sampler when I teach the workshop.  However, this time around, I thought having a small wallhanging to bring home might be fun.  I applied the same techniques to 2 different projects - a butterfly and a parrot (a very handsome parrot named Herbie).  To do bobbinwork, you need to use a heavier thread in the bobbin - one that doesn't work on top as it won't fit through the needle - any needle of any size.
 One of my favorite threads for bobbinwork is Candlelight by YLI. I know there are other brands - Madeira has Glamour and Ricky Tims has one; they all work equally well.  I've just used Candlelight for so long, love the colors and how it lays on the fabric.  Unlike many heavier threads, it's very soft and doesn't affect the hand of the fabric.  You can also use it in your bobbin case, often without any tension adjustment.  If you do need to adjust the tension, use a designated bobbin case.
 I fused the pieces down and marked them on top with a thread in the bobbin that will show on the wrong side.  This is the marking I will follow to do bobbinwork. The far left is marked for doing bobbinwork; the part on the right has already been stitched with heavier thread.
 I sew from the wrong side so the heavier thread appears on the right side - make sense?
 My favorite thing to use is a decorative stitch; it really stitches pretty in the heavier thread.
 I choose a stitch that's symmetrical and not too wide as it's easier to do from the wrong side.
 I also love to do bobbin beading which is done with Candlelight and a black thread on top to make it look like beads, not the real thing, but a pretty effect.
 So my little guy is almost done and it's time to start on Herbie the handsome birdie.
More on my other favorite thread, next time!

Tuesday, July 17, 2012

Fun Nursery Stuff

Life has gotten a little crazy around here with my daughter due with her first child in 3 weeks. She's having a girl and we are all so excited.  My handy and very talented husband made a dresser/changing table for the nursery.  The top changing part comes off easily when there's no more need for it.
 I had the job of making the curtains, lined with a room darkener.  I had never worked with that kind of lining fabric before;  it was very different to work with.  I love the fabrics that Jill chose for the nursery.
 Jill made paper pom pons for above the chair. They really add a lot of "pop" to the room.
 And for above the crib, we both made together....
 a fabric bird mobile. My non-sewing daughter called me from a quilt store in Atlanta and asked me if I had ever heard of a "fat quarter" (I laughed hard over that). Her arms were full of all these fat quarters, she wanted to buy out the whole store.
 Think she got bitten by the bug! A quilt shop will do that.
 Jill made each bird using 2 fabrics - tummy and top and all so colorful.

 We attached them to twigs and hung fishing line down the middle for hanging.
 They bounced and swayed ever so gently. I know our new little girl will love it.
Jill made them while visiting here so I haven't seen them hung over the crib but I'll be going there tomorrow - can't wait.

Friday, July 13, 2012

More Marbling

I have more marbled fabric to share, I'm getting ready to wash it out - to get out the excess alum and methyl and soften up the pieces.  One of the most fun fabrics we used was a "white on white" stripe on sheer. Kate brought yards and yards of it to share; it marbled beautifully and the stripes were so obvious.  The fact that it was sheer was an extra plus, so good for layering or putting through the printer.
 I did lots of veining which is my favorite thing to do. This is a heavily veined piece, lighter veining I would print an image over using my inkjet.
 I really liked this piece. I was tempted to do something over it but felt it was busy enough.
 This piece was printed on one of my favorite "fabrics" - soil separator cloth" from Home Depot.  It's very sheer and resembles pattern duplicating material from fabric stores.
 This next piece (below) resembles the Stonehenge series which I really like and use a lot.  I like the white running through it. Where there was no paint, the white fabric popped through.
 This was one of the first pieces I did demonstrating some of the more traditional patterns using rakes and creating feather like designs. I really thought it needed more and did WHAT ELSE, but some veining on top to give it dimension and make it look less traditional.
 And a detail - looks better with some veining.
 I remember years ago having a favorite color made by Deka called Blueberry. I don't know why it suddenly came to me but halfway through our marbling, I mixed up a batch and used it the rest of the time. I think everyone else did also.
 I didn't like this piece that much but then splattered some Flow Release on top which makes the paint spread and form little circles.
And still more to come....

Tuesday, July 10, 2012

"Marble-ous Marbling"

This past week our Fiber Junkies group met for 2 1/2 days of marbling or as one of our members said - Marbelous Marbling. Some of us had already done some marbling. I had also written a book but there were still so many new things to explore.  
 Here is one of Kate's pieces, not quite finished but still looking great. The way she manipulates paint to get it into a landscape design is no easy task!
 We had some wonderful studio space and our own trays which I got from Domino's pizza years ago. They were used to hold the balls of dough and the perfect size for marbling a good size piece of fabric
 We had the luxury of having an entire table for supplies.
 After making the Methyl Cellulose which is a thickened liquid used to float paints on the surface, we started in.  Most paints have to be thinned to the consistency of milk which we did and then we were ready...set...go.
 Dropping the paints on the surface and watching them spread was magical. Another interesting thing in marbling - when you drop a paint on top of another paint, the colors don't mix together. The one on top forces the one underneath to spread out, making room for it.
 One of the most fun things we did was veining.  After the paints were dropped, we loaded a giant wok cleaner (looks like a whisk) with something called Flow Release. We then tapped the "whisk" so droplets would fall on the paint causing it to move and make vein like designs.
 After we created a design that we liked, we lowered our fabric on top. It only takes a few seconds for the design to transfer to the fabric, but that can be a very looooong few seconds when you're excited to see the results.
 And there you have it - the one on the right is the one made from the pan above.
 It was an incredibly hot 2 days but all the better for drying and aluming the fabric.
 Dee Dee had samples from a decorators book with the paper edges which we alummed and used for marbling.
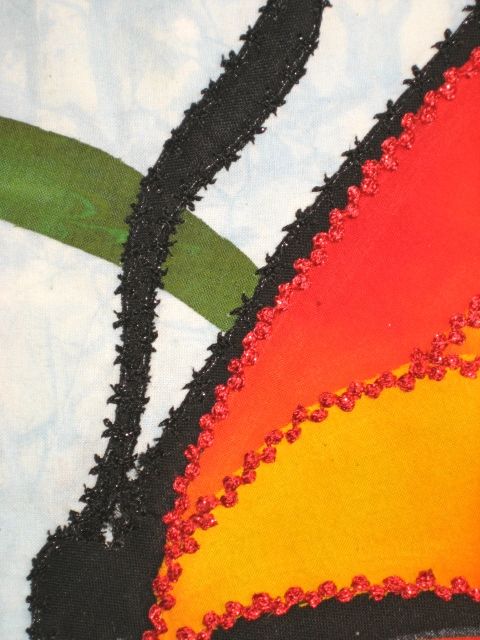
 Some of the worst fabrics gave us the best prints like this inexpensive sparkly fabric from Walmart.  It marbled really well and had a great sparkle to it.
 Many fabrics were overmarbled which is simply marbling a design, lightly rinsing it and allowing it to dry.  There is still enough alum in it for you to marble it again.  In the print below, I liked the original but didn't love it....so...
 I overmarbled it with veining giving it more dimension.
Stay tuned for more really fun fabrics to see.
Til next time...

Tuesday, July 3, 2012

Happy 4th of July

Happy 4th of July. Have a safe, happy holiday. I am thankful to live in such a wonderful country and to the men who serve to keep our country great.
I'll off and running again this week - this time for a marbling get-away with my fiber junkies group. We'll have 3 days of great fun exploring this wonderful technique...will also have lots of pictures to share.