Artistic Photo Quilts by Charlotte Ziebarth is one of my favorite publications with good, user-friendly instructions. Charlotte uses Photoshop Elements but most techniques can be applied to other programs. So with her book in hand, I set to work.
.JPG) In my photo file, I found a sunrise I liked and could be cropped in different ways.
In my photo file, I found a sunrise I liked and could be cropped in different ways.++10.JPG) I loved the colors but wanted to see what would happen if I used the "auto-color-correction" tab under Enhance in Photoshop Elements - I really like this verson also, but more like a sunset.
I loved the colors but wanted to see what would happen if I used the "auto-color-correction" tab under Enhance in Photoshop Elements - I really like this verson also, but more like a sunset.++10+Auto+Color+Correction.jpg) So then I took it a step further with this photo, opened Enhance - adjust color-color variations - decrease blue which was also a nice look.
So then I took it a step further with this photo, opened Enhance - adjust color-color variations - decrease blue which was also a nice look.+10+Auto+Color+Correction+with+blue+removed.jpg) Then I decided to take the original picture, hit Enhance - adjust color and then hue/saturation. Using the top slider under hue, I moved it back and forth to get a look more neutral in flavor. I like neutrals so this is a possibility.
Then I decided to take the original picture, hit Enhance - adjust color and then hue/saturation. Using the top slider under hue, I moved it back and forth to get a look more neutral in flavor. I like neutrals so this is a possibility.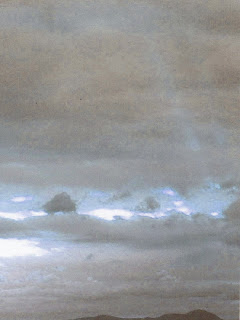++10+Using+Hue+Saturation+slide+(10+on+Picture+package).jpg) Charlotte suggests doing a paper mockup on graph paper before printing on Fabric. I loved this idea. Gather up photos you like or use the one photo to make duplicates to crop different sizes and angles. Go to File-print layout -picture package. The picture package gives you many options for sizes and combinations. I pick one with many different sizes. Click ok; the last picture you clicked on will appear in all the boxes in your picture package. To get a variety of pictures, go up to Use-folder and browse which will give you access to all your pictures. Click on the box you want to change and then the picture you want to replace it. Click open.The new picture will appear in that box. Do that for each box and you'll wind up with something that looks like the photo below.
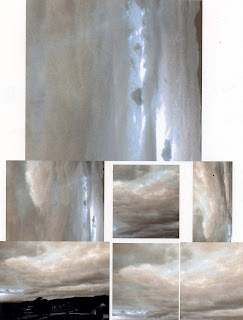
Charlotte suggests doing a paper mockup on graph paper before printing on Fabric. I loved this idea. Gather up photos you like or use the one photo to make duplicates to crop different sizes and angles. Go to File-print layout -picture package. The picture package gives you many options for sizes and combinations. I pick one with many different sizes. Click ok; the last picture you clicked on will appear in all the boxes in your picture package. To get a variety of pictures, go up to Use-folder and browse which will give you access to all your pictures. Click on the box you want to change and then the picture you want to replace it. Click open.The new picture will appear in that box. Do that for each box and you'll wind up with something that looks like the photo below.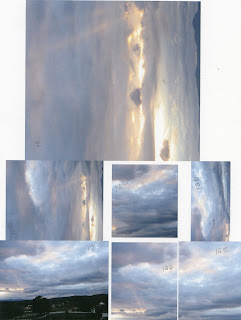++Picture+Package+numbered.jpg)
++Picture+Package+recolored.jpg)
No comments:
Post a Comment